PvP-ness

I have recently had a couple of guildies get me involved in PvP warzones (something that I never even considered touching for the first 18 months I ever played the game), and have come to realize that I really really suck!!  I mean I am downright awful. I know that there are currently three reasons for this, and at least a couple of the reasons will resolve themselves with time.

IMG_0005

First, when I attempt to play on Zernebog I am immediately focused and demolished. Being at max level and just beginning to PvP does not bode well for a new PvP experience. I am in all PvE gear and have no expertise, so I am immediately looked at as a, “Hey, get that noob over there!” target. I know how to play my class at least moderately well, I think (if any of my readers have been grouped with me in the past and disagree, please let me know). Here I know what I am doing wrong and if PvP’ing as a Jugg tank is something I want to pursue I will just end up someday rolling a new Jugg tank for PvP’ing.

warzones-005

Secondly, I am a noob. I fully expect to get my ass handed to me over and over and over again (and to any team that has the displeasure of having me as a part of it-I’m sorry. I will get better with time), so the constant loss does not really bother me (at least I am not usually at the bottom of the match rankings). I mean, of course it would be nice to win one someday, but seeing as how I am a noob, the whole PvP experience is something to adjust to. I have been listening to the Ootinicast episode with Snave and been trying to get some pointers from Chuck and Brian (I have a Bad Feeling about those guys) concerning strategies, and I think with enough practice and preparation I will get beyond “noob” status.

Ja'rilo

Third, the main PvP character I have is Ja’rilo. He is a level 16 Shield Tech Powertech (tank). I don’t really know the class very well yet, and one of the few abilities I had has just been removed with 3.1.1, so I need to find a new rotation-especially for the low levels. (For anyone that does not know already, Vanguards lost the Full Auto ability in 3.1.1 while Powertechs lost Unload). I know Unload doesn’t belong in a rotation at higher levels, but as a level 16 I don’t have a lot in my bag of tricks.  This, of course, will be remedied with experience and research, but right now it is a little frustrating (and the fact that Flamethrower does not really target an enemy-player or mob-but rather just erupts in front of your character). I have been enjoying PvP on Ja’rilo and I think I will get better as time goes on.

Dodola (2)

I have never attempted to heal in PvP though. I have had several people that I have grouped with tell me that I would make a great PvP healer due to the fact that I attempt to keep all my party healed up (even those damned Marauders that want to pull before the tank). I will probably try at some point, but I am not sure that a Sorc would be the best class to try PvP healing with-especially since Dodola is decked out in level 49 gear (she just dinged 50).  Does anyone have any advice regarding PvP healing?

Do you have any advice about PvP strategies?  What is your opinion about the state of PvP in the 3.1.1 era?  Lastly, do you have any advice for people like me that are just starting to get into PvP or know where to find a PvP tanking guide for both the Juggernaut and the Powertech?

Standard

Guildies are like family

Heyo, everyone!  (Like that, Xarg?  That “heyo” was just for you!) I unfortunately have not gotten much of a chance to have a presence in-game this week, and that has led me to really miss my guildies!  Though we do have our own guild website where I (or any of our other guildies) can check-in and throw some information onto the forums or send messages to guildies that may need some assistance, there is nothing like being on our Raidcall channel and chatting with the regulars while we are all in-game. It has been quite some time since I have had the pleasure of not only belonging to a group but actually having a tangible role in that group (for any of those that do not know, my main is a Juggernaut tank and I have grown to love tanking so much that I have recently rolled a Powertech and will eventually roll a Tankasin as well).

On another note, it is so refreshing to see more and more new members coming into my SWTOR family.  We have had an influx of new recruits lately, and I love seeing the new blood!  I hope some, at least, have been due to my Guild Ready Check appearance on Corellian Run Radio (episode 138: From SWTOR with Love-my Guild Ready Check is from about 48 minutes to 52 minutes), but we have not heard one way or the other from many of our new recruits. I am just so happy to see my Star Wars family growing more and more.

In some guild news, we just got our Guild Flagship!!!  It bears the name of one our chief contributors (no, not me, we have some people in the guild that are able to devote much more time in-game than I seem to be able to). I am looking forward toward the ability to take a stroll around it once our interior decorator has had her way with it. Stay tuned for some pics from the Steel Shadow and our guild Stronghold.

How much do you feel like your guildies are part of your extended family?  Am I crazy to feel that strong of a connection with people I have never met?  I know we all develop friendships through the games we play online (especially when we cooperate with other players), but people look at me funny when I talk about my in-game friends. Especially since chances are I will most likely never meet many of them in person.

Standard

Update!

Hi, everyone!  Nothing big here.  Just wanted to mention that I have added some contact information to my Introduction page along with my character list.  I will be sure to update this area anytime something changes (level changes, new characters, new server/guild, etc).

Contact:  Zerneblog@gmail.com

Standard

Juggernaut Tanking Guide

Update: 3/23/15 Update including suggestions posed by TankingFTW (use of Saber Reflect, alternate opening rotation, additional information concerning changes to Tool Tips following 3.0),

Having been playing an Immortal Juggernaut since 2.3 (Titans of Industry update), I thought that I would like to share the information that I have garnered with the rest of the community.  This guide is aimed at the beginner Juggernaut and offers advice on gearing, keybinding, threat management, rotations, the use of guard, and the set-up of your user interface.  This guide should not be  looked at as a be-all and end-all guide to the Immortal Juggernaut because there are still parts of the class that I do not know.  I have had very limited experience with raiding with the Juggernaut, and if you are looking for advice surrounding this part of the class, I would urge you to instead look at Artorias‘ guide for the Immortal Juggernaut.  Artorias definitely knows the class and has had a lot of experience raiding on the Juggernaut (and the Republic mirror class, Guardians).  I have, unfortunately, not had the pleasure of playing with Artorias though we are on the same server.

zerne char sheet

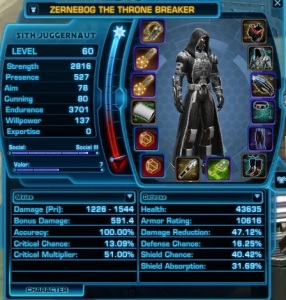
(I am in a mix of 172’s, 178’s, 186’s and a couple pieces of 192’s, so I am not quite geared enough to begin attempting the new Operations)

Gearing

Gearing an Immortal Juggernaut is not all together that difficult.  Your role as a melee tank is all about keeping the enemy mobs bashing on you rather than the rest of your (squishy) party.  In order to ensure that you can live through the battle, there are several things that you need to remember.  First and foremost, the sooner that you can gear yourself in orange-grade (moddable) gear, you should.  Not only will this allow you to keep a set of armor that you like through end-game, it will also allow you to move your stats to other gear that you like the look of better.  In my experience, I was able to complete the story of the Juggernaut in the same gear from Nar Shaddaa until the Forged Alliances story-arc.  I have been using new pieces here and there as I find them, but the look of Zernebog hasn’t changed much otherwise.

Armoring Icon

Armoring:  You will mostly use Guardian Armorings though most of your progression.  Once you unlock the Sonic Barrier (passive ability that will generate a shield around your Juggernaut whenever using Force Scream) and Enraged Defense, you will want to begin to switch those Guardian Armorings with Might Armorings.  The reason for this is that the heals granted from your 10 stacks of Enraged Defense and the damage mitigation granted through Sonic Barrier are tied to your Strength stat.  By using Might Armorings instead of Guardian Armorings, you increase your Strength stat more than your Endurance.  In lower levels the Endurance granted through Guardian Armorings will help you much more than the benefit you will gain from Might Armorings.

Mod

Mods:  For me, this was one of the most difficult areas to figure out because by the mid-thirties Guardian Mods are no longer being offered.  It is also important to note that Commendation Vendors do not really offer any Mods that are designed for Juggernaut Tanks.  You will begin by buying Deft Mods which are optimized more for the DPS specs than for the Tank.  Once you are able to begin getting Elusive Mods from quest rewards, you will want to begin taking them instead.  Elusive Mods, however, are aptly named because they are just that-elusive.

Enhancement Icon

Enhancements:  This is where it gets a little bit more difficult for Juggernaut tanks.  There are four different types of “tanking” enhancements.  For those of you that have played Assassin (Shadow) tanks or Powertech (Vanguard) tanks, you are used to gearing for Shield Chance and Absorption Rating.  While Juggernauts also use a shield generator and will benefit from Shield Chance and Absorption Rating, Defense is king for Juggernauts.  When given the option between two enhancements, always choose the one that will grant a greater Defense rating.  Normally this will either be called an Immunity Enhancement or a Bulwark Enhancement.  Immunity Enhancements offer a better mitigation rating than Bulwark Enhancements because Bulwark Enhancements are optimized to grant additional Endurance by trading off mitigation stats.

Hilt Icon

Hilts:  Through most of your leveling you will want to be taking Guardian Hilts.  This will give you more Endurance over Strength which will help with your health pool.  However, once you begin to get into many of the higher levels, you will want to take a Might Hilt instead because Enraged Defense and Sonic Barrier both use your Strength stat as its baseline for heals per stack of Enraged Defense and damage absorption from Sonic Barrier (granted through the use of Force Scream).

In all gearing choices always choose the piece that will grant Defense over any other stat.

Keybinding

Keybinds

I went into my own keybinds in my last post, “Juggernaut Keybinds” .  The advice that I have most for new Juggernauts (especially those going for tank spec) is to get used to moving through the mouse.  This has made my gameplay so much easier, especially including the ability to move backward being bound to the scroll wheel of my mouse (Mouse Button 3).  In the “Juggernaut Keybinds” post I also touch on the various abilities and what the tooltips say about each (the descriptions are not taken directly from the in-game tooltips, but they do contain all the information that I would give to others).  Keybinding is much easier than clicking on each ability to me because it allows you easily continue the fight.

Some basic information to remember when considering keybinds:

1.  Group your Defensive Cooldowns together (Saber Ward, Saber Reflect, Invincibility, Enraged Defense, Endure Pain)

Zerne Quickbar 3

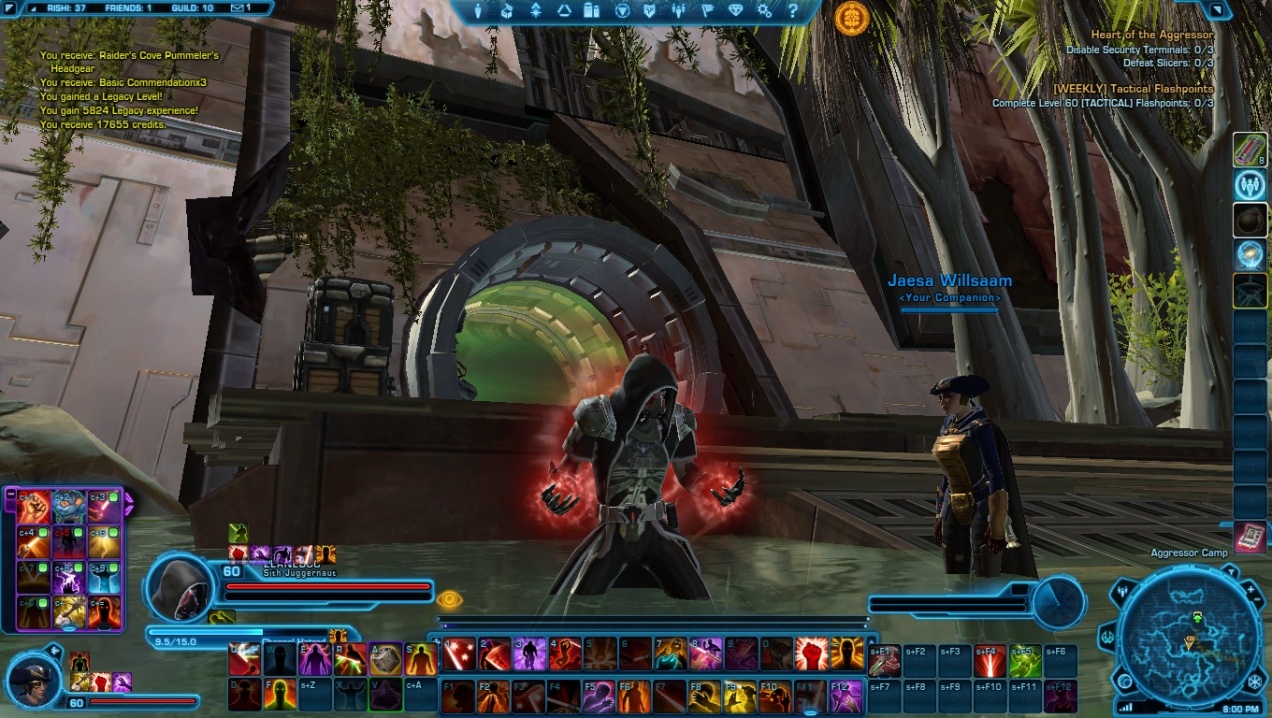
(Here you see my Defensive Cooldowns Quickbar)

From top left moving to the right:  Saber Reflect, Unleash (CC Breaker), Invincibility, Saber Ward, Clickable Relic, Enrage (grants 6 rage immediately)

Bottom Row:  Enraged Defense, Endure Pain, Chilling Scream (slows enemy mobs while granting a 50% movement increase to allies), Second Clickable Relic

2.  Keep your taunts easily accessible.  (I have mine bound to F5 and F6 because they are in the middle of the keyboard)

Taunts

3.  Keep Guard easily accessible in case you need to guard swap.  (I have this set to F11 because it is near my class buff)

Guard

Threat Management

Your job as a tank is to establish threat (also called aggro) on all enemies.  This is easier said than done.  Juggernauts have a few ways of generating threat:  damage output, threat modifiers (abilities that may deal little to no damage but generate a lot of threat), the tanking stance (Soresu Form), and the use of taunts.  Please also check out the “Use of Guard” section for additional information on managing threat.

Damage Output:  This is a little low with Juggernauts at this point in time, so when it comes to establishing initial threat, you would want to stick to your high-threat generating abilities over normal damage abilities.  For instance, Ravage is the ability that does the most damage for Juggernauts, but the threat generated is fairly low (1:1 ratio of damage to threat so if Ravage is doing 300 damage per tick, it is only granting 300 threat per tick).  Damage Output is great for keeping threat, but it is not something that you would want to rely upon to establish initial threat.

Threat Modifiers:  This is where Juggernauts shine.  We have several abilities that grant much higher threat than the damage that they put out.  Examples include Saber Reflect (deals no damage due to the fact that it is a damage mitigation tool, but it does cause force and tech damage to be redirected back at the enemy.  There are two ways in which to take advantage of the threat generated by Saber Reflect: either aggressively to generate threat at the beginning or defensively to maintain threat while mitigating additional incoming damage), Force Scream (which is also essential for damage mitigation from your Sonic Barrier), Backhand (which also stuns your enemy), Crushing Blow (generates pretty decent damage and high threat, and can be used as an AOE ability when paired with Aegis Assault), and Smash (one of the few AOE abilities granted to Juggernauts)

Thank-you TankingFTW for bringing my attention to the aggressive use of Saber Reflect and the AOE component of Crushing Blow when paired with Aegis Assault.

Soresu Form

Tanking Stance:  Your tanking stance for the Juggernaut is Soresu Form.  This form increases your armor by 60% while doubling your threat generation.  While DPS classes deal one threat for every one point of damage, while in Soresu Form Juggernauts deal two threat for every one point of damage.  This really helps with our threat generation, but we are still behind Powertechs and Assassins (Vanguards and Guardians for you Republic players) in terms of DPS. It is imperative that you use your tanking stance if you want to tank because a Juggernaut in Shii-Cho Form cannot hold aggro. Your tanking stance also generates rage for each time you are attacked rather than having to rely upon your rage generating abilities.

Taunts

Taunts:  It is very important to know how taunts work in SWTOR.  Not only will a taunt force enemies to attack you for six seconds, it also increases your overall threat generation by 10% over the ally with the highest threat.  Some good advice for taunts, however, are not to use them during your opening rotation because your DPS allies will overtake your threat in almost no time.  (I personally would rather wait to use my taunts until DPS has completed their burst, but other some Juggernauts disagree and use a taunt in their normal rotation.). Secondly, do not hold onto taunts like they are gold. Juggernauts have two taunts, a single target and an AOE.  Try not to stack the taunts one atop the other because they both have cooldowns and will need to be used separately.  Use your taunts, of course, but do not blow them both at once.

Rotations

I will include my opening rotation as well as my personal ability priority, but for those that really want to understand the Juggernaut rotation in-depth I would urge you to check out Artorias’ guide on Dulfy.net (link is provided above).

Opening Rotation:

Force Leap SmashCrushing BlowTabAegisChokeRavageTabBackhandTabScreamSmashAegisCrushing BlowSpamSweeping

Force Leap to target

Smash nearest group

Crushing Blow on original target

Switch target

Aegis Assault on new target

Force Choke target

Ravage on target

Switch target

Backhand to stun

Switch target

Force Scream (applies Sonic Barrier)

Smash any enemies that are in a group

Aegis Assault

Crushing Blow

Spam Sweeping Slash to maintain threat

Alternate Opening Rotation (Provided by TankingFTW):

EnrageForce LeapCrushing BlowBackhandScreamRetaliationTauntRavageSmashAegis(Fillers)Threatening Scream

Precast Enrage (Immediately grants 6 rage)

Force Charge

Crushing Blow

Backhand

Force Scream

Retaliation

Taunt

Ravage

Smash

Aegis Assault

(fillers)

Threatening Scream (AOE Taunt)

This rotation also works wonderfully against a single target such as a Flashpoint Boss, Class Mission Boss, Heroic Mission Boss, or Operations Boss because it makes use of much of your high-threat abilities.

After establishing threat the ability priority is to continually use your high-threat abilities while waiting for them to come off of cooldown.

RetaliationRetaliation  is a high priority ability that is off the Global Cool Down

ScreamForce Scream to keep your Sonic Barrier active

SmashSmash to apply the 5% Accuracy Debuff

AegisAegis Assault to maintain your 5% Defense and 5% additional damage buffs, also allows Crushing Blow to affect 5-8 additional enemies (Thank-you, TankingFTW, for pointing out this change in the Tool Tips)

Crushing BlowCrushing Blow is your highest hitting ability and generates a lot of threat

Using Guard

Guard Tooltip 2

Here is the tool tip for guard as shown in-game.  The biggest thing to remember here is “While active, the guarded player takes 5% less damage and generates 25% less threat.”  The remaining description only applies to PvP (Player verses Player) rather than PvE.  It is not the damage reduction or the damage transfer that indicates the use of Guard, but it is rather the 25% reduction in threat that you want to make sure you are applying to allies.  You want to place your guard ability on the player that is most likely to steal aggro from you.  There are many theories that surround the use of Guard, but my advice for using Guard is as follows:

In lower levels, you will want to guard your healer.  This is mainly due to the fact that you will encounter many DPS players that would rather beat away at the highest-difficulty enemies rather than following the kill order (weakest first, strongest last).  Due to the nature of healing, aggro is placed on all enemies at a rate of 1 threat for every 4 HP of heals.  This applies to all enemies though, so if you are tanking one enemy and your DPS players are wailing away on two others of a group of six, the other three enemies will target the healer.  Make sure you are always changing your targets to keep your healer protected.

In later levels you will want to guard the DPS that is most likely to generate more threat than you.  In my experience, there are three classes that are most likely to take over threat from me.  The first is the Marauder class, second is the Assassin, and third is the Sniper.  It will always be easier for a melee DPS player to rip aggro away from the tank than it would a ranged DPS.  I have found that I usually don’t have to worry much about Sorcerers, Operatives, or other Juggernauts, but almost any time that I am in a group with a Marauder, Assassin, or Sniper, I lose aggro if I do not have guard on that player.  Pay attention to your Target of Target window to see if the enemy is switching its focus to someone else rather than you.  If someone consistently rips aggro from you, swap your Guard to that player to reduce their threat by 25%.

Another blogger has a great blog post concerning the use of Guard here (Shout out to R2D2Arm and his blog post!).  There are some additional posts in the comments section that you should read to see how other people feel about the guard dilemma.

User Interface

Your User Interface is the way that your screen is set up.  There are many parts of the Interface that do not always appear and must be manually enabled.  To begin editing your User Interface, press the ESC key while in-game and choose “Interface Editor”.

UI Edit

Once the Editor opens, your screen will look similar to this:

custom_ui_editor

(Thank-you, junkiesnation.com, for the blank UI Customization Screen)

The areas in Green and Blue are both already enabled, and those in Red will need to be manually enabled if you wish to use them.  The most beneficial of these UI sections is seen as a small red rectangle in the lower right area of the User Interface pictured above and is called the Target-of-Target window.  This window will show which player the enemy you have selected is focused on.  As a tank, this should always, always, ALWAYS, be you (unless you are in a raid and are tank-swapping with your co-tank).

Zerne UI

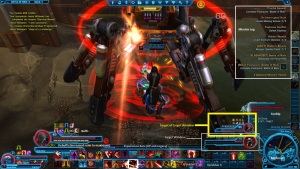
Here is my User Interface.  The various parts have been labeled so that you can compare them to the blank UI screenshot provided above from junkiesnation.  This works out great for me while tanking, and the Target-of-Target window is the absolute best piece that I have ever unlocked for my UI.  I highly recommend you unlock it through your UI customization.  Otherwise, I have my quickbars placed where I can easily see them so that I know which keybind to use for which ability.  I have also scaled my personal debuffs to the highest allowable setting through the UI Editor.  This really allows me to see how many stacks of what debuff I have on me and gives me ample room to hover so that I can read the effects on my tooltip.

Focus Target

The Focus Target is another User Interface window that can be enabled through the User Interface Editor.  This tool allows you to select a particular target (usually the raid boss you are facing) to keep focused while doing other things within the fight.  For example, if you are acting as the off-tank in an operation and adds spawn, you would leap to the group of adds and begin to tank them for the rest of your group while the main tank holds onto the raid boss.  When the adds are finished, you want to get back on the raid boss, so if you have enabled the Focus Target window and set the raid boss as your focus target, you can just click on the window then leap right back to the boss instead of using your mouse to move the camera around and then click on the boss as it exists within the instance.  By using Focus Target in this way, it saves valuable time from the raid and allows you, as the off tank, to assist in the DPS of the boss.  This also works very well when needing to do a tank swap such as Firebrand and Storm Caller in the Explosive Conflict operation.  These two tanks (bosses that are literally tanks) need to be swapped between player tanks in an effort to keep the Incinerate Armor debuff down.

Conclusions

I find tanking to be the most fun and interesting role in SWTOR (though many will disagree with me).  One thing I will say, however, is that the group lives or dies because of the tank.  You will be treated harshly if you are not to snuff and run a lot of PUG’s (Pick-Up Groups).  Know your encounters and watch videos done by tanks.  Learn to look out for stupid (reticles that appear on the ground, you will always want to move out of these, but do not face your target toward your group).  Tanking is all about situational awareness and making sure that the enemies are always attacking you.  You are the sponge to soak up the damage.  Let the DPS worry about burning down the enemies, you just need to make sure they are focused on you.  Communicate with your healer (I cannot stress this enough).  A good tank with a good healer will be able to ensure that content is able to be conquered (most of the time-hardmode operations and some Level 60 hardmode flashpoints do tend to include DPS checks on bosses).

Please feel free to leave your comments below, and if I have forgotten anything or misrepresented a concept, please let me know.  The only way to be a better tank and a better blogger is to have your mistakes pointed out to you.

May the force serve you well.

And happy tanking!

Standard

Shout It, Shout It, Shout It Out Loud

Hello, everyone!  I apologize for the extended time between my last post and the next one to come about, but I am currently working on a tanking guide for the Juggernaut class and need some more screenshots in order to finish it. I am probably about 2/3 of the way finished, but I don’t think I will be able to get it posted this week. You can expect it sometime early next week though. As always, I am very interested in community feedback, so please feel free to comment on the guide once it is posted.

On a side note, I want to give a shout out to all those podcasts and bloggers that keep me centered around the SWTOR universe.

Ootinicast, you guys rock and it is always such a pleasure to listen to you (though I am about nine episodes behind!).

Corellian Run Radio:  Heather and Jason, thanks for the opportunity to highlight my guild, The Order of Shadow Knights, on your show. Also, you two are amazing hosts and Heather’s laugh is always great to hear!  It wasn’t until recently that I discovered how much more content you have on the site that is helpful for in-game content.

Healing SWTOR:  Louie, you are one badass healer, and the information you have on your cast is amazing!  It has really helped me become a better healer on my Sorc.

Torocast:  I just started listening to you all, but I have heard of most of you before. This latest episode with XamXam’s appearance was great and the entire episode was very enjoyable. I am looking forward to future episodes and to listening to some of your past ones.

Pretty Little Sith:  I’ve been following Heather’s blog for quite some time-it was the first SWTOR blog I ever read. A large part of the reasoning there was because I was attempting to level a tankasin before I finally scrapped it and rolled the warrior that would become Zernebog.  You keep me interested in SWTOR news and are one of the few blogs that I will read when the posts aren’t related to the game. Congrats on your new house too!

XamXamSays:  I first discovered you when you appeared on Corellian Run Radio during Exploit-gate and really like your insights. From there I searched you out to read what you have to say on a more regular basis. I love your posts and find myself looking toward your blog for PvP information. If anyone ever wants a no-holds-barred review of SWTOR news, look no further than XamXam. Always entertaining and quite insightful.

Ravalation:  Your blog is wonderful. I also really love the fact that you put yourself out there on other blogger’s sites. I have really appreciated the comments you leave here and you always have me looking at my gameplay in a different way. I am a die-hard Imperial, but it doesn’t mean that I can’t respect you Republic players! *wink*

Going Commando in SWTOR:  Shintar, your stuff is new to me and I have been enjoying getting caught up with your posts. It is nice to see so many healer-driven blogs out there, and I am quite happy to see the discussion that is revolving around this role all the time. You bring some great insights into the game!

Pixelkaffe: You had me hooked with your keybinding post and made me look at the way I play differently. I can’t say that I have adopted any of your strategies, but I am glad for the insight. I also like that your posts aren’t all news or gameplay and you take a different view of exploration. I look forward to the posts still to come.

PowerDress Gaming: I think we started at about the same time, and I like your slant as a SWTOR travel agent. It always brings a smile and makes me think about my time in-game not always having to revolve around grinding. It is nice to be reminded that there is a lighter side to game play than gear and leveling.

There are tons more out there, and others that I follow. If I didn’t mention you here it is because I am still getting into your posts. There are several posts that show up in my blog reader that I haven’t had the opportunity to really start looking at. I appreciate everyone that blogs or casts about the SWTOR community, and I thank you all for what you are doing to unite the fans with all the information out there. I know I would never be able to see all of this without your help. Your insights always push me forward with my own gameplay. Thank-you for all that you do!

Finally, I would like to give a shout out to all my friends in the Order of Shadow Knights. You all hold a very special place in my heart and I am so happy that I get to spend my time in-game with you. I have developed some great friendships with many of my guildmates, including (but not limited to): Raveonette, Xargaa, Veenla, Verduga, Steel, Masja, Rohahem, and Allisee. You are all so amazing and make playing SWTOR one of my favorite activities. Never change-you are all perfect the way you are!

May the force serve you well.

Standard

Juggernaut Keybinds

Keybinds

As many have seen, there are several keybinding guides out there, so I thought that I would give a post of how I use keybinds on my Juggernaut Tank.  I will post another later that will also show my Sorcerer Healer keybinds, but I don’t have a screenshot of that quite yet.  To me, it was easier to group similar abilities together, or abilities that often follow each other in my rotation together.  I should, however, note that I move solely with a mouse, having backward bound to the scroll wheel of the mouse.   I only have the keyboard for my laptop and a normal two-button mouse with scroll wheel.

Featured image

Here are my main two Quickbars.  The top contains my main combat abilities along with my resting regeneration ability and my class buff.  I have these bound to 1 thru Equal Sign.  The abilities are as follows (along with the bound keys):

1:  Assault (This ability generates rage and is a relatively low-threat and low-damage ability, but having it bound to 1 is easy to hit and allows me to continue the fight while some abilities are on cool-down)

2:  Aegis Assault (places a defense buff when used and has taken the place of Sundering Assault following 3.0)

3:  Force Leap (this is the ability that I usually use to initiate combat, quickly closing the gap between the enemy and me)

4:  Ravage (just a damage dealer, good amount of damage, but low threat)

5:  Smash (applies a debuff to enemies that wonderfully synchronizes with Crushing Blow, also an AOE ability)

6:  Crushing Blow (generates high threat and is a small AOE ability)

7:  Force Choke (generates high threat while immobilizing the enemy, great on the Immortal Juggernaut because it no longer has to be channeled)

8:  Saber Throw (I will often use this ability to hit a mob that is away from the group so that I get aggro on it as well)

9:  Vicious Throw (Juggernaut finishing move, only useable if the enemy is below 30% health)

0:  Intercede (allows me to leap to an ally while lowering their threat)

-:  Class Buff (this is in the same location no matter which class)

=:  Regeneration Ability (also in the same location no matter which class)

F1:  Force Scream (easily accessible and provides a shield to me while generating high threat)

F2:  Disrupt (Juggernaut interupt)

F3:  Sweeping Slash (AOE strike that can hit up to three targets.  Allows me to continue to fight while keeping aggro)

F4:  Retaliation (Finally off the GCD!  Lowers mobs’ accuracy while increasing my defenses)

F5:  Taunt

F6:  Threatening Scream (AOE Taunt)

F7:  Vicious Slash (a rage burner.  I hardly use this ability because I can use so many others and would rather generate rage than burn it)

F8:  Backhand (generates a high amount of threat while stunning most enemies)

F9:  Heroic Moment

F10:  Intimidating Roar (paralyzes weak and standard mobs for a few seconds).

F11:  Guard

F12:  Force Push (great to use to group mobs together.  Using it also finishes the cooldown on Force Leap)

So my opening rotation generally consists of Force Leap to a target, a short jog over to the next part of the group to Smash (especially now that it no longer requires a selected target), Crushing Blow on the original target, Sweeping Slash against the group (unless there is a ranged mob firing at my group in which I Saber Throw at him/her before Sweeping Slash the group).  I then tend to begin to change my targets by grabbing one in Force Choke, using Ravage on the next, then Backhand on yet another.  From this point, I generally have pretty decent threat against the group.  This is especially true when I am on a single target (though I then delay the use of Backhand).

Defensive Cooldowns

Featured image

These are bound to QWERTY and DFASGH

Q:  Saber Reflect (reflects damage back to the attacker, generating a high amount of threat)

W:  Control Breaker (I don’t remember the name of this ability, but it is a self-cleanse)

E:  Invinsible (reduces 40% of all incoming damage)

R:  Saber Ward (this is where I bind any kind of shield, whether it is Saber Ward of the Sorc “bubble”)

T:  Relic

Y:  Enrage (immediately grants 6 rage)

D:  Enraged Defense (grants “x” charges and as damage comes in, heals for a specific amount)

F:  I don’t remember the name of this ability, but it grants a 30% HP increase for 30 seconds, reducing back to normal after.             This is great for “OH SHIT” moments or on cooldown in a boss fight to help cushion the healer

A:  Unused

S:  Chilling Scream:  Slows mobs’ mobility

G:  Relic

H:  Unused

Miscellaneous

The only other real keybinds that I have are a shift modifier attached to F1 to trigger my mount.  This is located on Quickbar 4 (along with some almost never used abilities such as Sacrifice, Legacy Force Choke, etc).  Quickbar 5 does not really contain any keybinds because I have abilities associated with it that are used often enough that it is a pain to open up the “Abilities” tab to use them (such as Companion Dance, Quick Travel, and my Emergency Fleet Pass).  I also have my medpacks installed on the top set of Quickbar 5.  I just don’t really use medpacks that much.

Zerne Quickbar 4

Quickbar 4

Zerne Quickbar 5Quickbar 5

Post-Script

So what are your keybinds like?  Do you find it easier to move with keybinds or with a mouse?  Do you have any advice for me moving forward with my own keybinds?  Any feedback you would like to leave would be more than helpful as I continue to try to improve my ability to tank more and more difficult content.  As always, I appreciate your attention to Zerneblog and the feedback that continues to come from the rest of the community.

May the force serve you well!

Standard

Directive 7

directive-7

I didn’t really get much of a chance to take advantage of the Double XP weekend this past weekend due to the fact that I began a pretty extensive kitchen renovation in my 105-year-old home, but I did get to play a little on my level 50 Sorcerer Healer, Dodola. Directive 7 popped twice through Group Finder (and amazingly enough I got to play with the same Marauder both times). Though a fun flashpoint, I can honestly say that I absolutely HATE this flashpoint-especially the final boss, Mentor. The first run went pretty smoothly, though we did wipe once on Mentor. The Assassin tank on this run was absolutely AMAZING!!! The second run, however, did not go nearly as smoothly. We had a Level 54 Powertech Tank that seemed incredibly squishy, though that could have also been caused by the incredible lag I was experiencing while attempting to run this flashpoint. The tank then decided to rage quit on the mid-point boss, Bulwark. I didn’t really have any time to attempt a second run with the group after the Tank quit, and I feel bad about that, but what can you do? I anxiously await that next level so I can spend the utility point on Force Mobility which will make defeating Mentor so much easier! The fact that Sorc healers are pretty much stationary except for Resurgence until level 51 makes Mentor incredibly difficult due to the need to run away from the claw. I have two tips to offer for players looking to run Directive 7 though. First, and of utmost importance: DO NOT fall into the water!!!!!! This is incredibly annoying and makes the rest of your group feel like you have no idea what you are doing (trust me-I’m the one that fell into the water on both runs). Secondly, if you are tanking, please make sure that your healer is tagging along with you. If you initiate combat away from the healer, you should expect to die or at least come close. I realize that tanks set the pace for the adventure, but please take the time to make sure that the rest of your party is within Line Of Sight before pulling. If you don’t want to wait for your party, expect to die.

Now that I have finished that rant, I would like to note that I had the distinct pleasure of recording a Guild Ready Check with the Pretty Little Sith that will appear on the Corellian Run Radio podcast. I look forward to the exposure that the Order of Shadow Knights may receive from that spot. Make sure you catch Corellian Run Radio and follow Pretty Little Sith at corellianrun.com and prettylittlesith.com. Thanks for reading, and I hope you enjoy this blog as much as I enjoy writing it!

May the force serve you well.

Standard

Introduction

Hello, and welcome to Zerneblog, a blog centered around the healer and tank roles in Star Wars: The Old Republic. I am known as Zernebog across The Ebon Hawk and am a member of the Order of Shadow Knights-a group of casual players that like to hangout in-game and take our time running content. I main an Immortal Sith Juggernaut and have only recently begun the Shadow of are an expansion (I am just now getting to the solo-mode story run of Blood Hunt on Rishi) and reached level 60 a couple of weeks ago. My only alt, at this time, is a Corruption Sith Sorcerer named Dodola. Dodola is sitting at level 49 and just completed Chapter 2 of the Sith Inquisitor story. I have been playing SWTOR since August of 2013, only getting pretty serious about it since December of 2013.

You may be wondering what you can expect from Zerneblog. Ideally this will be a space for me to talk about my experience tanking and healing in the SWTOR galaxy. I am partial to the Sith Empire, so for the foreseeable future all posts will be from the Imperial point of view. I will also be talking about some events of my own life, but only as they pertain to SWTOR. I want all my readers to feel comfortable in approaching me for information or for sharing their own experiences. I hope to be informative about this game that I love so dearly. If you are on The Ebon Hawk and find yourself in need of a guild, we would love to have you as part of our Order. Just leave your character name(s) in the comments field below and I will make sure that a guild invitation is extended to you. You may also feel free to add any or all of my toons to your in-game friends list and chat with me anytime you see me in-game. I am certainly not so stingy that I will refuse to assist you in your own questing. First and foremost, I hope that everyone remembers that SWTOR is a game and we are all in it to have a good time. I look forward to reading your questions and comments as this blog gets off the ground and I begin to add other alts to my character list.

Character List 

(Name, level, gender and species, advanced class and discipline, base class, guild, server)

IMG_0005

Zernebog (60)  Male Zabrak, Immortal Juggernaut (Sith Warrior)  Order of Shadow Knights (Ebon Hawk)

Dodola (2)

Dodola (50)  Female Rattataki, Corruption Sorcerer (Sith Inquisitor) Order of Shadow Knights (Ebon Hawk)

Ja'rilo

Ja’rilo (16)  Male Cathar, Shield Tech Powertech (Bounty Hunter)  Order of Shadow Knights (Ebon Hawk)

Contact information:  Zerneblog@gmail.com

May the force serve you well.

Standard